Introduction
When we talk about race conditions, it typically refers to a concurrency problem in multi-process or multi-threaded programming. However, in frontend development, we might not directly encounter multi-threaded programming frequently, but we often face similar situations related to race conditions. A common example is in asynchronous programming, especially when dealing with asynchronous events, callback functions, or Promises.
For instance, consider the following asynchronous code:
let data;

function fetchData() {
  setTimeout(() => {
    data = 'Fetched data';
  }, 1000);
}

fetchData();
console.log(data); // Outputs undefined
In this example, the fetchData function is asynchronous, and it assigns the data to the data variable after 1 second. However, due to JavaScript’s single-threaded nature, the fetchData function waits in the main thread’s event queue for 1 second. Within this 1 second, the console.log(data) statement executes immediately, and at that point, the value of data is undefined because the fetchData function has not completed yet.
In asynchronous programming, due to the non-blocking nature of the code, similar race condition issues can arise. When dealing with asynchronous operations, it’s crucial to ensure data consistency and correctness, avoiding accessing or modifying related data before the asynchronous operation is completed.
Race Conditions and Reactivity
So, how are race conditions related to reactivity?
Consider the following example:
let finalData;
watch(obj, async () => {
// Send and wait for a network request
const res = await fetch('/path/to/request');
// Assign the request result to data
finalData = res;
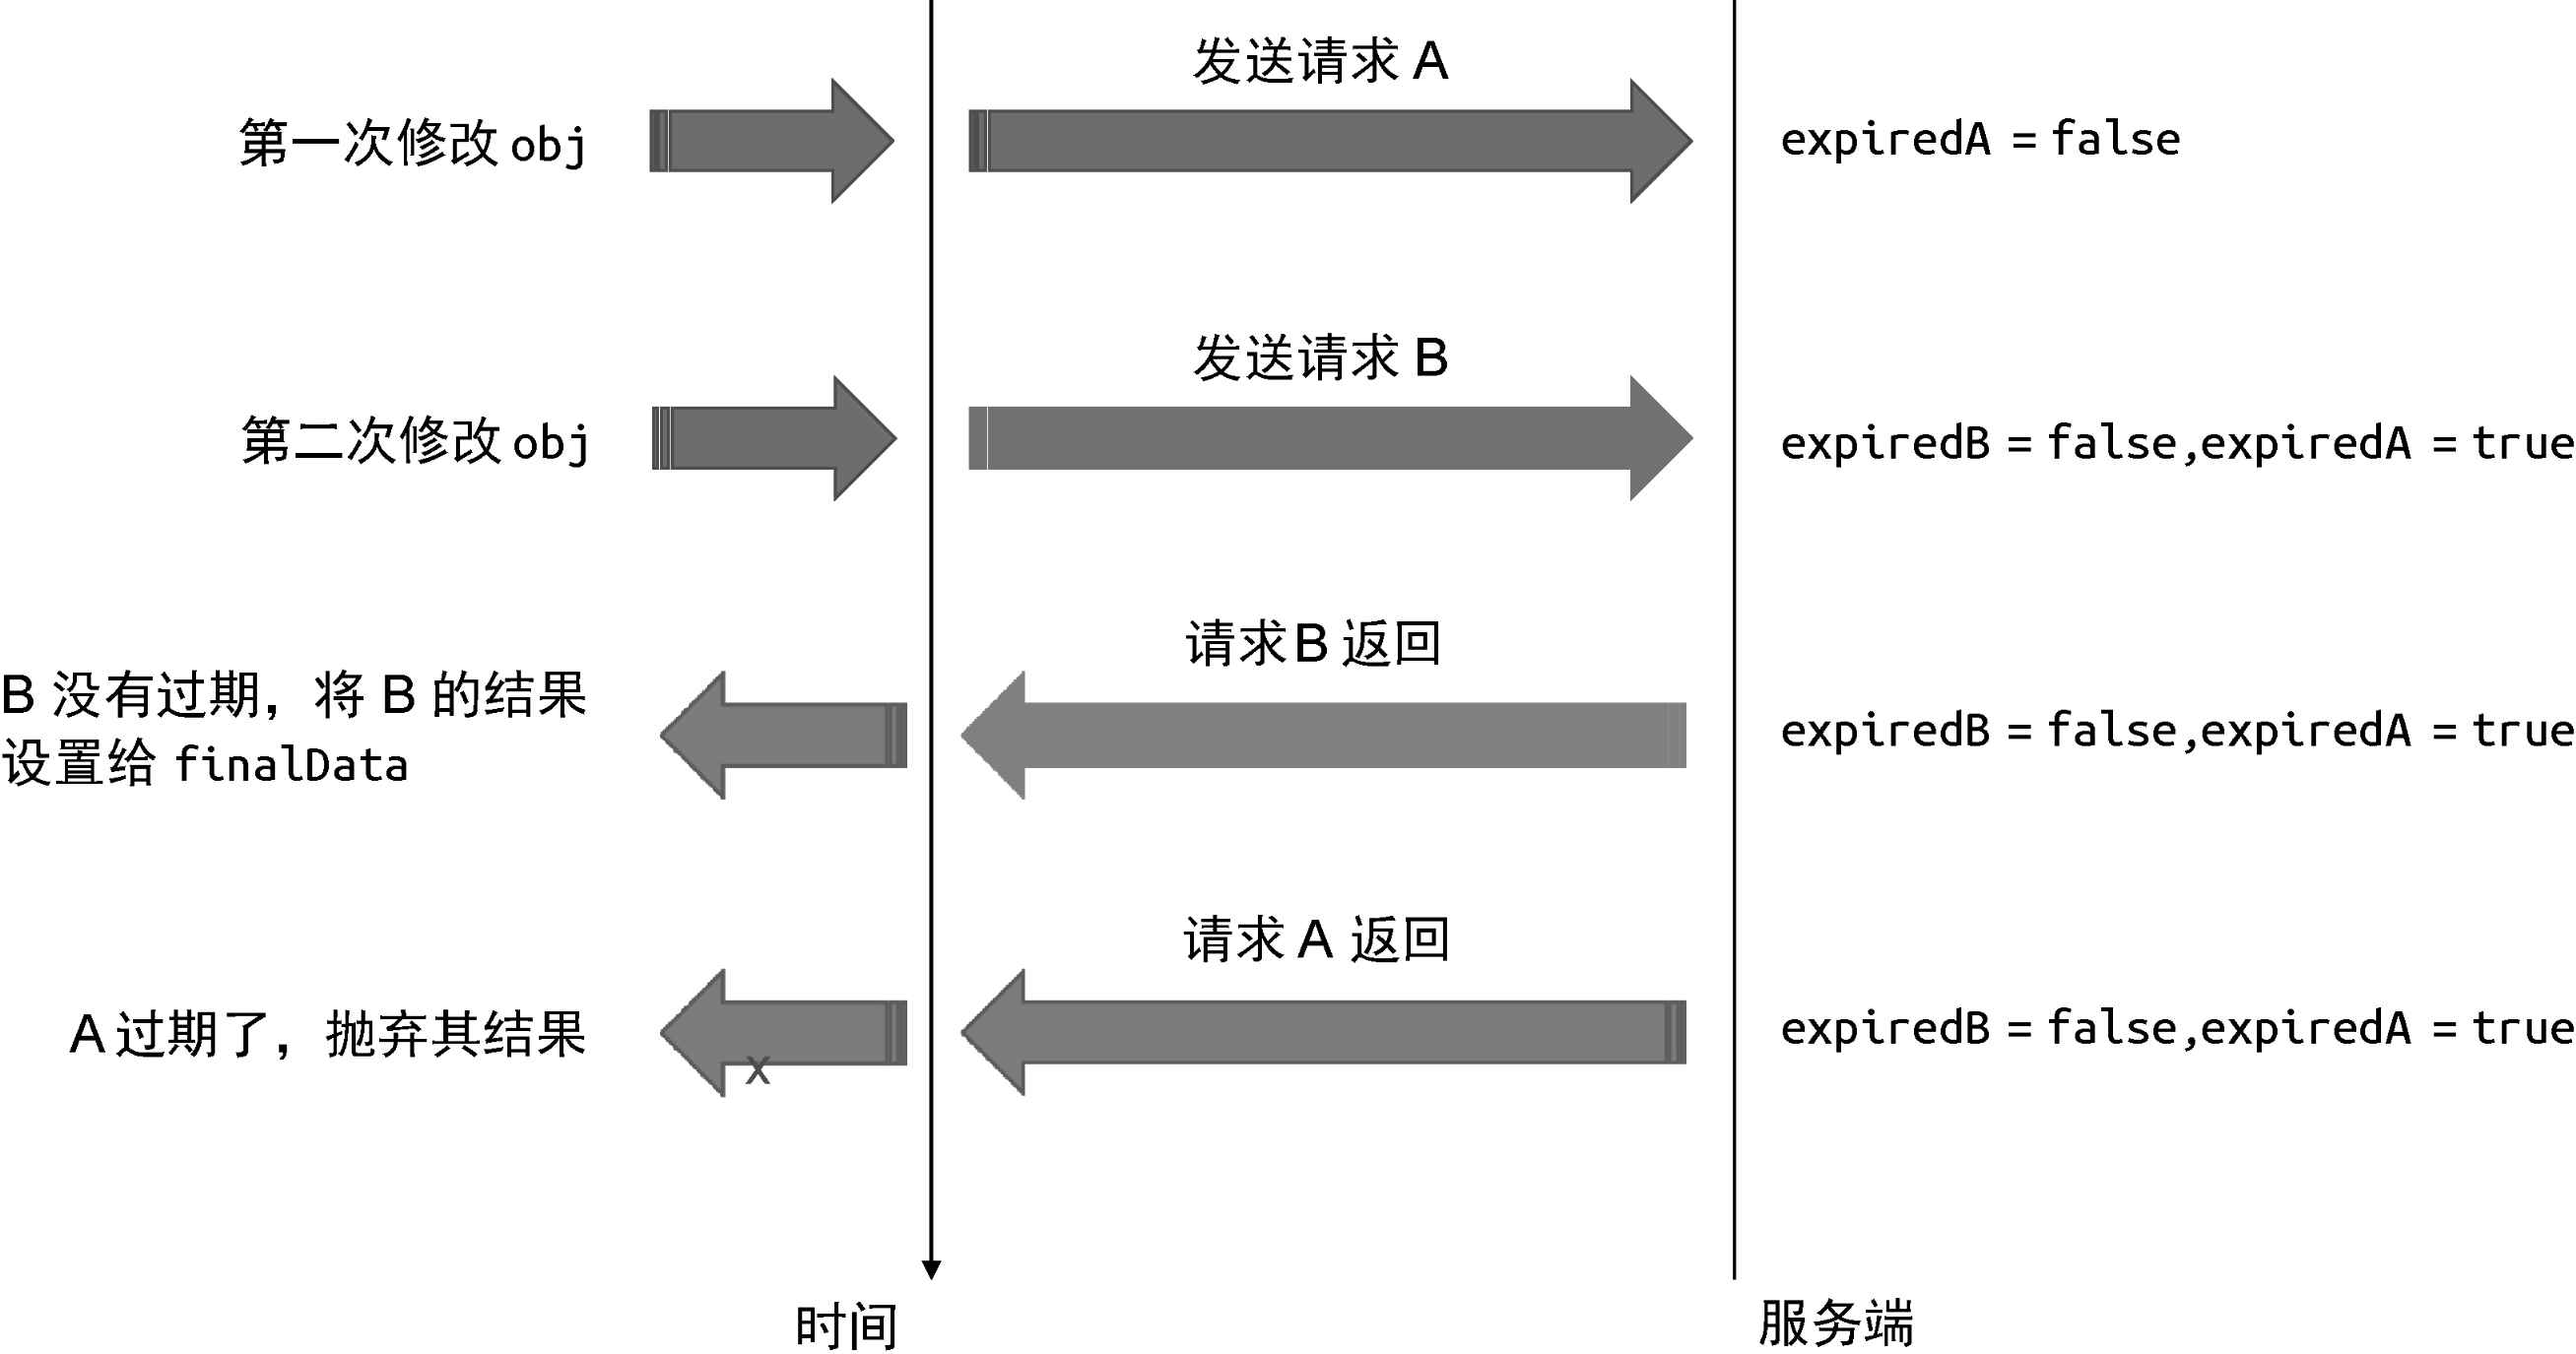
});In this code snippet, we use the watch function to observe changes to the obj object. Every time the obj object changes, a network request, such as an API call, is sent. After the data request is successful, the result is assigned to the finalData variable. At first glance, this code might seem fine. However, upon closer inspection, you’ll realize that this code can lead to race condition problems. Let’s assume we modify a field of the obj object for the first time, triggering the callback function and sending the first request A. As time passes, before the result of request A returns, we modify a field of the obj object again, triggering the second request B. Now, both request A and request B are in progress. Which request will return its result first? We don’t know. If request B completes before request A, the finalData variable will store the result of request B, making request A’s result outdated.

However, because request B was sent later, we consider its data as the “latest.” Request A is deemed “expired,” and its result should be invalidated. By ensuring that request B’s result is considered the latest, we can prevent errors caused by race conditions. Essentially, what we need is a way to expire side effects. To illustrate this concept further, let’s replicate the scenario using the watch function in Vue.js to see how Vue.js helps developers address this problem. Later, we’ll attempt to implement this functionality ourselves.
watch(obj, async (newValue, oldValue, onInvalidate) => {
  // Define a flag to indicate whether the current side effect has expired, initially set to false (not expired)
  let expired = false;

  // Call the onInvalidate() function to register an expiration callback
  onInvalidate(() => {
    // When expired, set the expired flag to true
    expired = true;
  });

  // Send a network request
  const res = await fetch('/path/to/request');

  // Perform subsequent operations only if the side effect has not expired
  if (!expired) {
    finalData = res;
    // Subsequent operations...
  }
});
As shown in the code above, before sending the request, we define an expired flag variable to indicate whether the current side effect has expired. We then call the onInvalidate function to register an expiration callback. When the side effect expires, the expired flag is set to true. Finally, we use the request result only if the side effect has not expired, effectively avoiding the issue described earlier.
Note: This article is a translated version of the original post. For the most accurate and up-to-date information, please refer to the original source.
```